Andrew
Active Member
Heres how to make your own obd-0 to obd-1 dizzy adapters. It's kinda quick, but you get the idea.
WIRE COLORS ARE NOT THE SAME AS YOURS. DON'T GO BY MY WIRE COLORS!!
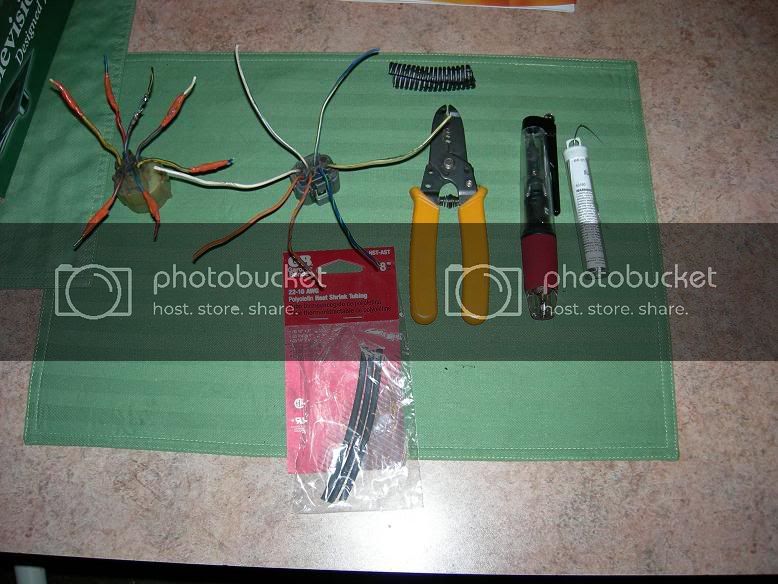
Stuff Needed:
-OBD-0 dizzy plug with wires
-OBD-1 dizzy plug with wires
-Soldering gun/iron. I've had a few, and this is my favorite. it's a butane one from RadioShack for $20.
-Solder. use what you like, I wanna say(from memory) this stuff is .35". Also from Radio Shack for about $3
-Wire stippers.
-Heat Shrink tubing. This is sold Everywhere. Home Depot, Lowes, RadioShack...
-Time. It only took me about 30min to do it, but it's also my first one, and I took some extra time to MAKE SURE of my wiring before I soldered it. Please Take Your Time!
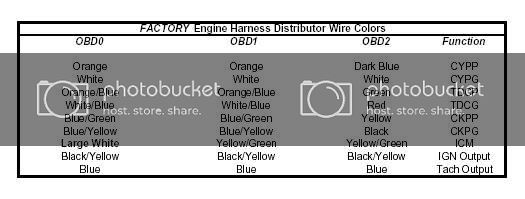
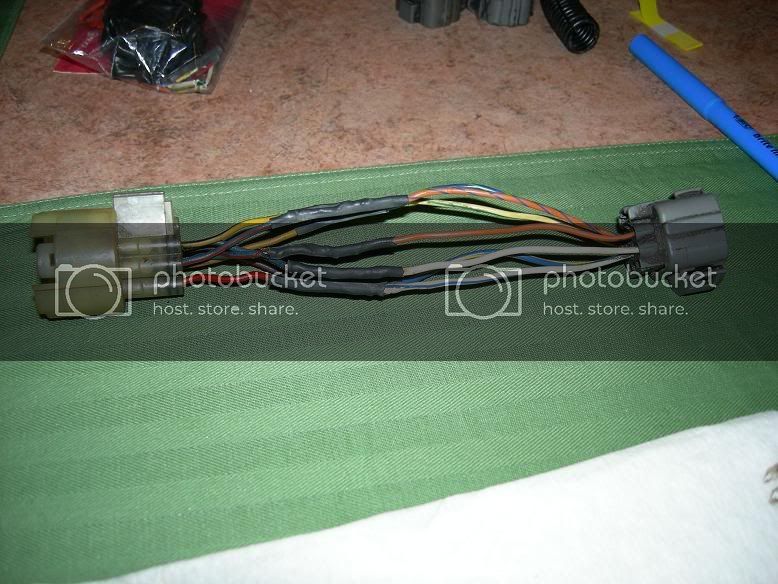
Use this picture for wire connections.
1. Gather your stuff
2. Useing Boomslang's Installation Instructions on page 6; If you don't have Adobe, use This PIC, and find the correct connection.
*Note* Don't forget to slide the Heat Shrink tubing on before you get to soldering! And make SURE of your connections.
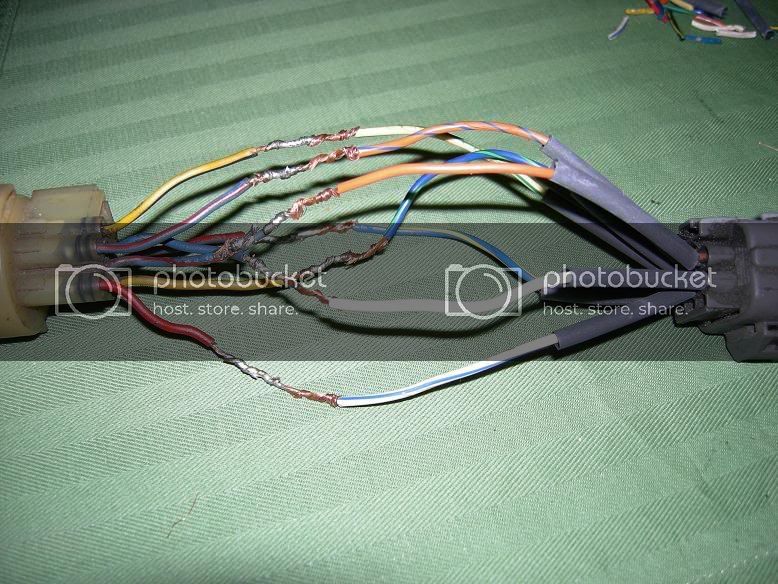
3. Start soldering after your SURE of your connections.


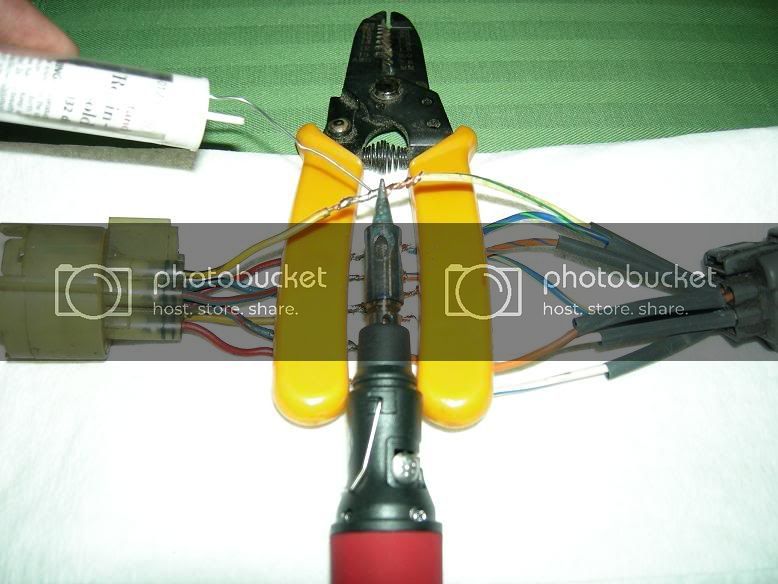
This helped me in the process of soldering the wires. I held the other wires down with the wire stippers. You can obviously use anything you want, but these were right in front of me. It just kept the other wires out of the way, and I didn't have to worry so much about burning them accidentally while focusing on the main wire I was soldering.
4. Now once you've finished wiring them all up, go ahead and heat-shrink the wires. If your not too familiar with the process of heat-shrinking, don't fret- it's a piece of cake. All you do is slip the tubing over the exposed wires and apply heat not directly to the tubing, but close to it. What I did was left my soldering gun on low and hovered it over the tubing, and it worked like a charm.
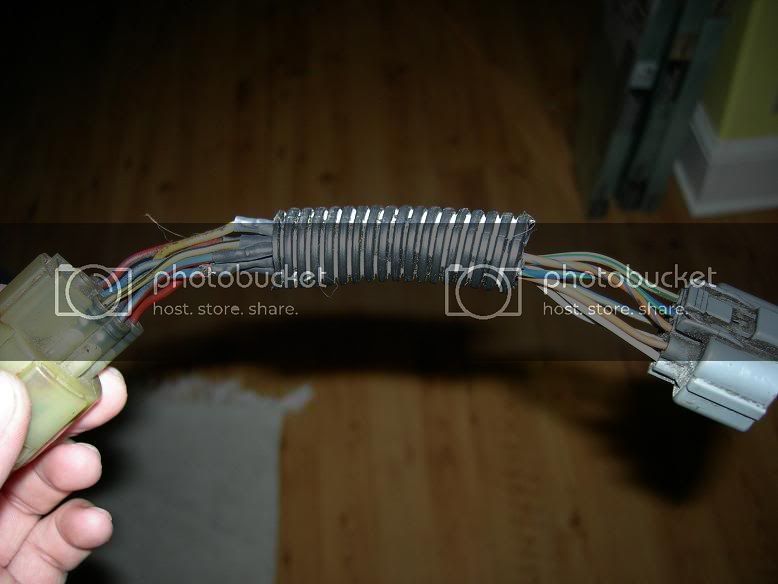
5. Do what you like from here on out. tape the wires up, cover them with wire looming like I did in this picture, it doesnt matter. I'd suggest doing this just for protection. I didn't leave it like this, I did this and then followed it up with electrical tape wrapped all the way around the length of the adapter, from plug to plug. The reason I used such a little amount of looming is so that the plugs can bend and I won't have to worry so much about pins being under pressure. (Which is the sole reason of this little project.)
Please enjoy, and tell your friends.")
Comments welcome as always. And don't forget to check my sig for other writeups too!
-Andrew
WIRE COLORS ARE NOT THE SAME AS YOURS. DON'T GO BY MY WIRE COLORS!!
Stuff Needed:
-OBD-0 dizzy plug with wires
-OBD-1 dizzy plug with wires
-Soldering gun/iron. I've had a few, and this is my favorite. it's a butane one from RadioShack for $20.
-Solder. use what you like, I wanna say(from memory) this stuff is .35". Also from Radio Shack for about $3
-Wire stippers.
-Heat Shrink tubing. This is sold Everywhere. Home Depot, Lowes, RadioShack...
-Time. It only took me about 30min to do it, but it's also my first one, and I took some extra time to MAKE SURE of my wiring before I soldered it. Please Take Your Time!
Use this picture for wire connections.
1. Gather your stuff
2. Useing Boomslang's Installation Instructions on page 6; If you don't have Adobe, use This PIC, and find the correct connection.
*Note* Don't forget to slide the Heat Shrink tubing on before you get to soldering! And make SURE of your connections.
3. Start soldering after your SURE of your connections.
This helped me in the process of soldering the wires. I held the other wires down with the wire stippers. You can obviously use anything you want, but these were right in front of me. It just kept the other wires out of the way, and I didn't have to worry so much about burning them accidentally while focusing on the main wire I was soldering.
4. Now once you've finished wiring them all up, go ahead and heat-shrink the wires. If your not too familiar with the process of heat-shrinking, don't fret- it's a piece of cake. All you do is slip the tubing over the exposed wires and apply heat not directly to the tubing, but close to it. What I did was left my soldering gun on low and hovered it over the tubing, and it worked like a charm.
5. Do what you like from here on out. tape the wires up, cover them with wire looming like I did in this picture, it doesnt matter. I'd suggest doing this just for protection. I didn't leave it like this, I did this and then followed it up with electrical tape wrapped all the way around the length of the adapter, from plug to plug. The reason I used such a little amount of looming is so that the plugs can bend and I won't have to worry so much about pins being under pressure. (Which is the sole reason of this little project.)
Please enjoy, and tell your friends.
Comments welcome as always. And don't forget to check my sig for other writeups too!
-Andrew
Last edited: