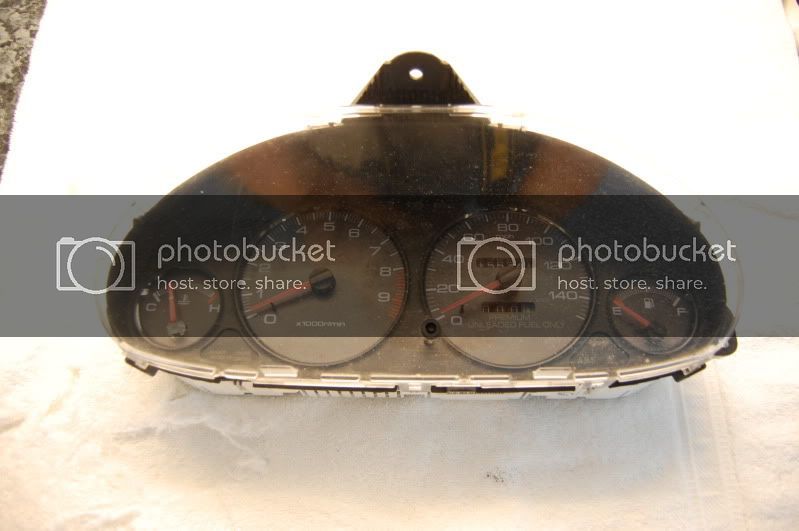
Here is a complete tear down and reassembly of a 94-01 LS manual Gauge cluster. Complete with pictures and references.
The cluster is often swapped into eg and ek civics for looks.
** Key note ** practice on an old cluster first, this will minimize damaged from not knowing the proper way to disassemble a cluster.
There are minor differences in this cluster, the automatic integra cluster, and the 98 - 01 GSR/Type R integra cluster. the automatic cluster has a shifter range selector, and the GSR/Tupe R has a security light above the MAINTENANCE REQUIRED light and a higher red line.
the automatic cluster has a shifter selector light setup (which can be deleted out with a manual gauge face set whether oem or aftermarket). the plugs are no different on any integra 94 - 01 cluster.
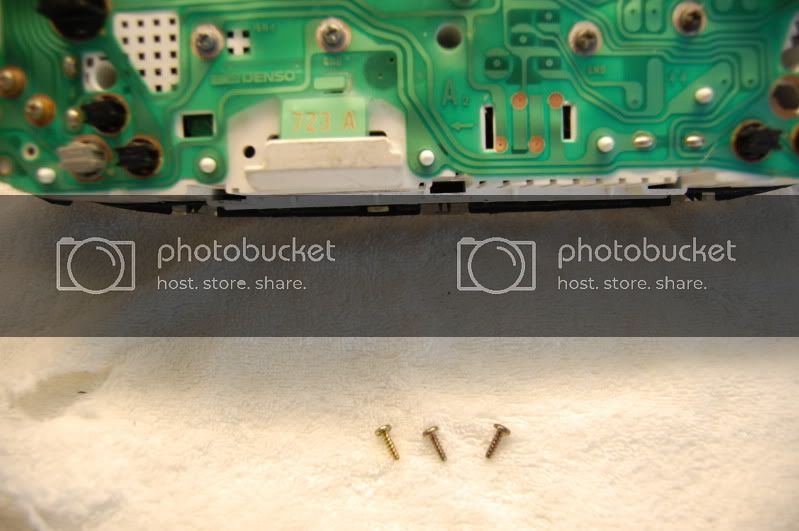
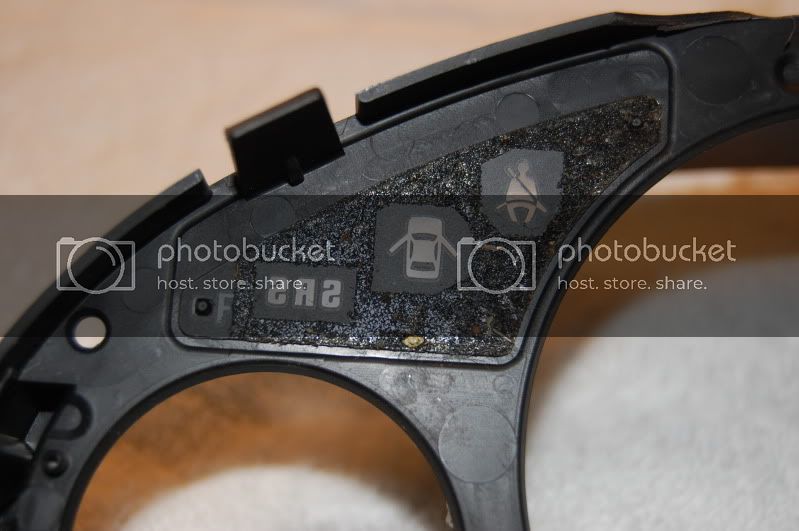
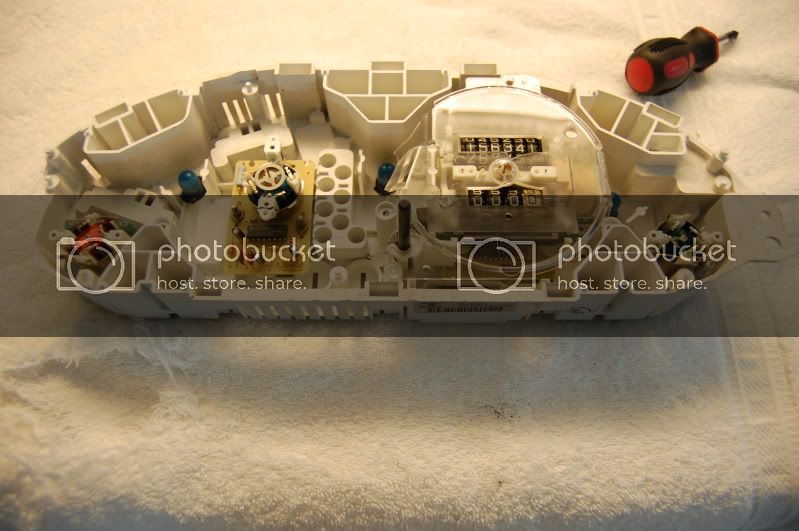
First step in disassembling the cluster is removing the screws from the rear of the facing. There are 3 small screws located below each LARGE bulb on the rear.
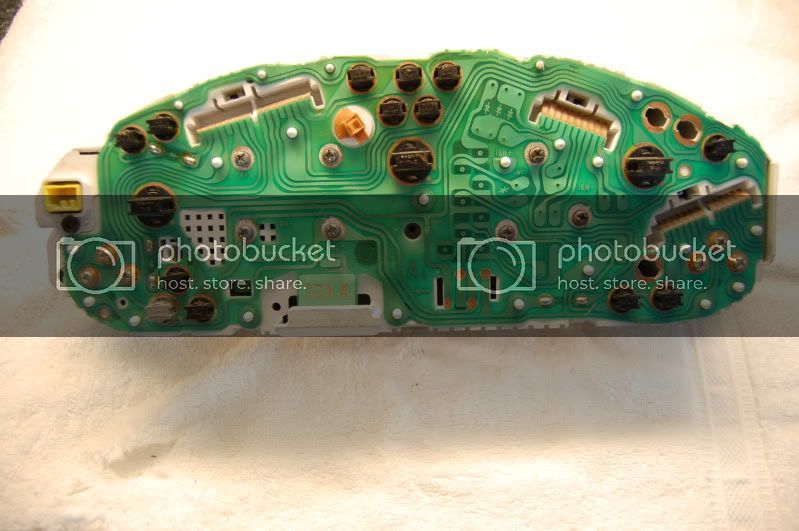
Once the three screws are removed, the clips on the outer edge of the cluster can be undone, there are 8 for the cluster face, and 9 clips for the clear cover.

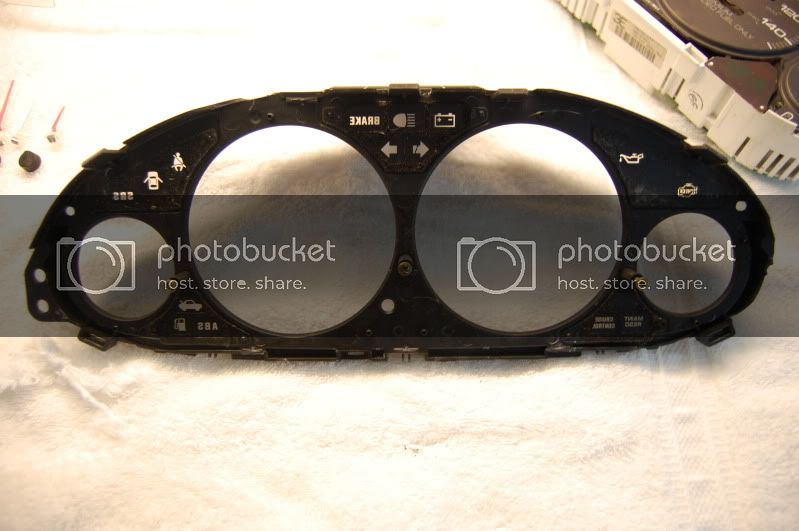
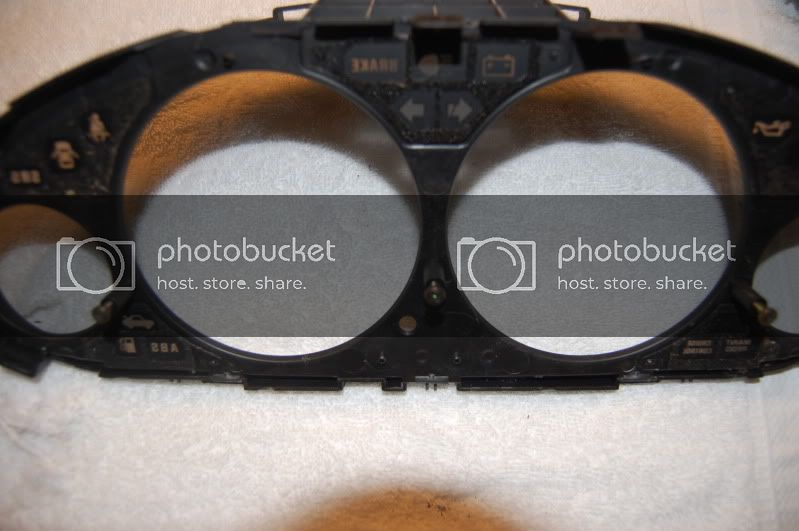
The face removed below. Noticed the opaque colored lenses for each light. Below each of the opaque lenses is a bulb you can remove and change either to colored or led (available on ebay). The bulbs are twist lock bulb. 1/4 twist counter clockwise and the bulb will pull strait out.


S
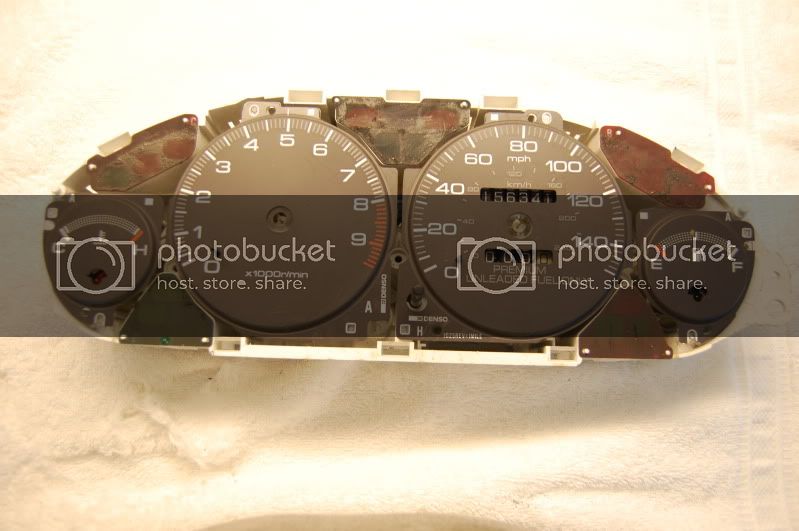
Pictured below, face with 3 screws reinserted
All of the signal light covers and decals can be removed. These are held on by two plastic tabs that are slightly over sized. Very easily removed.
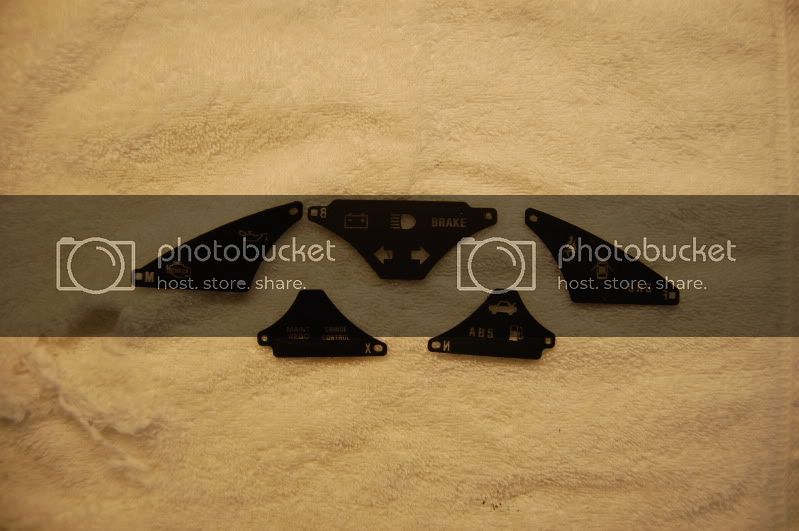

Notice the felt like covering around the decals on the sighnal lights. it is somewhat sticky ( i assume to prevent light from seeping into another signal lamp.

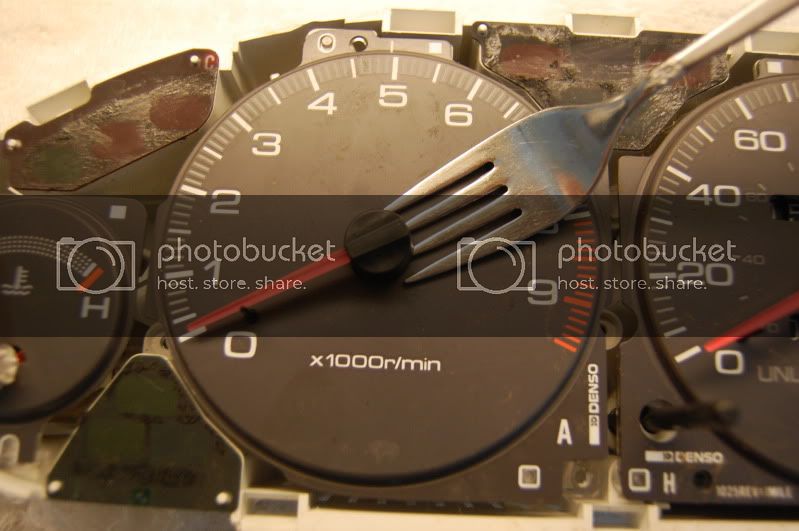
removal of the guage faces requires a fork to pry off the gauge needle. pry upward and these wil come off. the needles are not held on by anything except the size of the pin attached to the needle. it will pry off with a bit more force than most are used to.

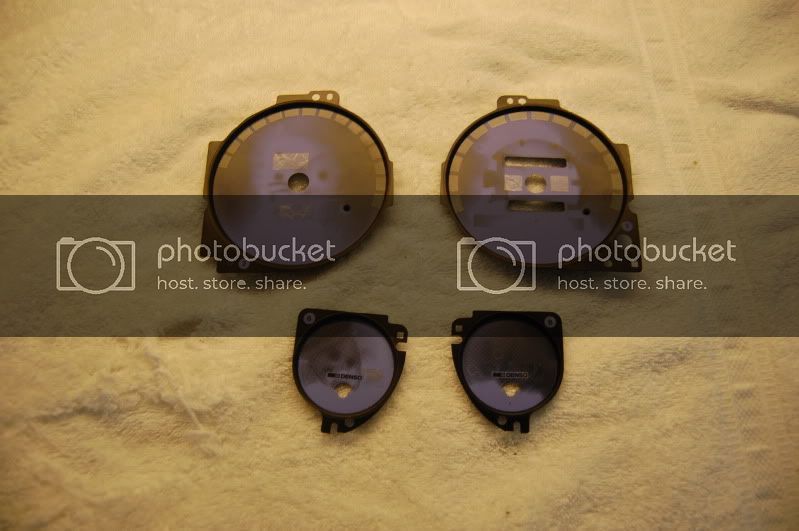
The gauge faces have a bit of sticky on the rear, a little prying with your fingers will loosen it up.

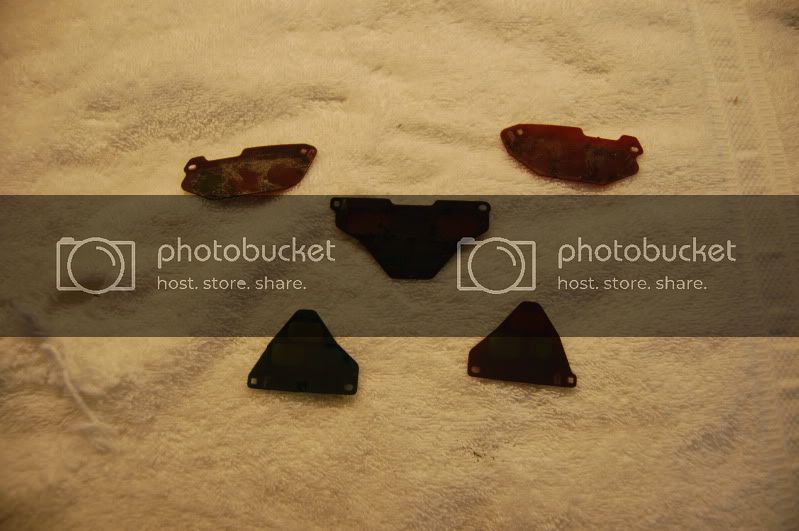
There are clear coves to distribute light from the three large bulbs in the back.
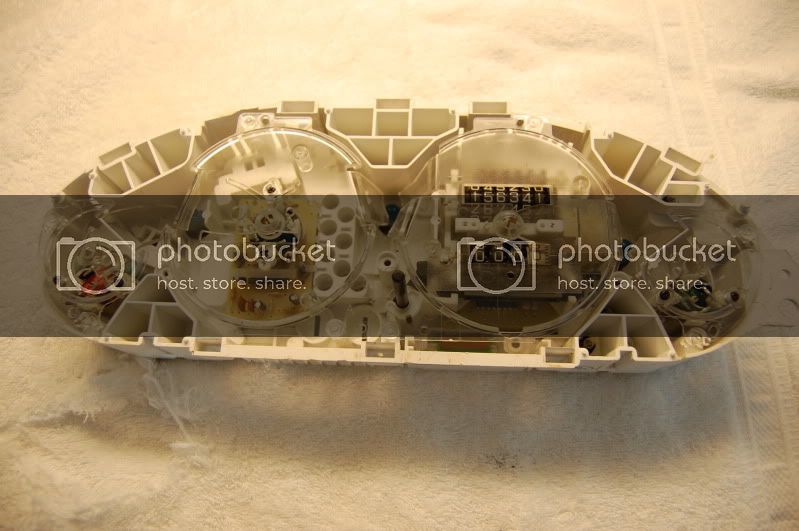
Each plastic cover is removed easily with two small screws on the back the speedometer with the odometer.
** Key Note ** you must not tamper with the odometer. altering the miledge fraudulently can lead to JAIL time
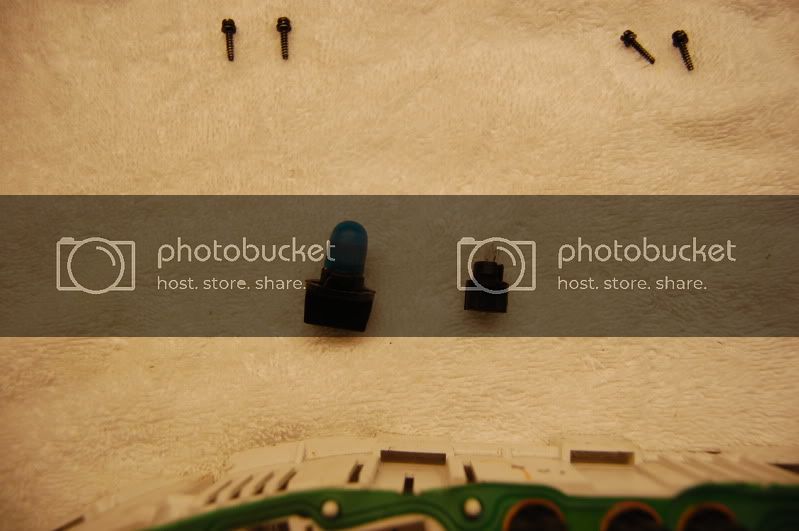
There are two types of bulb in this cluster, a small and large. the large illuminates the clusters awhile the small bulbs are for lights such as check engine, Oil, or any other light on the cluster.
Cluster odometer reassembled and reset to zero.

The cluster is often swapped into eg and ek civics for looks.
** Key note ** practice on an old cluster first, this will minimize damaged from not knowing the proper way to disassemble a cluster.
There are minor differences in this cluster, the automatic integra cluster, and the 98 - 01 GSR/Type R integra cluster. the automatic cluster has a shifter range selector, and the GSR/Tupe R has a security light above the MAINTENANCE REQUIRED light and a higher red line.
the automatic cluster has a shifter selector light setup (which can be deleted out with a manual gauge face set whether oem or aftermarket). the plugs are no different on any integra 94 - 01 cluster.
First step in disassembling the cluster is removing the screws from the rear of the facing. There are 3 small screws located below each LARGE bulb on the rear.
Once the three screws are removed, the clips on the outer edge of the cluster can be undone, there are 8 for the cluster face, and 9 clips for the clear cover.
The face removed below. Noticed the opaque colored lenses for each light. Below each of the opaque lenses is a bulb you can remove and change either to colored or led (available on ebay). The bulbs are twist lock bulb. 1/4 twist counter clockwise and the bulb will pull strait out.
S
Pictured below, face with 3 screws reinserted
All of the signal light covers and decals can be removed. These are held on by two plastic tabs that are slightly over sized. Very easily removed.
Notice the felt like covering around the decals on the sighnal lights. it is somewhat sticky ( i assume to prevent light from seeping into another signal lamp.
removal of the guage faces requires a fork to pry off the gauge needle. pry upward and these wil come off. the needles are not held on by anything except the size of the pin attached to the needle. it will pry off with a bit more force than most are used to.
The gauge faces have a bit of sticky on the rear, a little prying with your fingers will loosen it up.
There are clear coves to distribute light from the three large bulbs in the back.
Each plastic cover is removed easily with two small screws on the back the speedometer with the odometer.
** Key Note ** you must not tamper with the odometer. altering the miledge fraudulently can lead to JAIL time
There are two types of bulb in this cluster, a small and large. the large illuminates the clusters awhile the small bulbs are for lights such as check engine, Oil, or any other light on the cluster.
Cluster odometer reassembled and reset to zero.