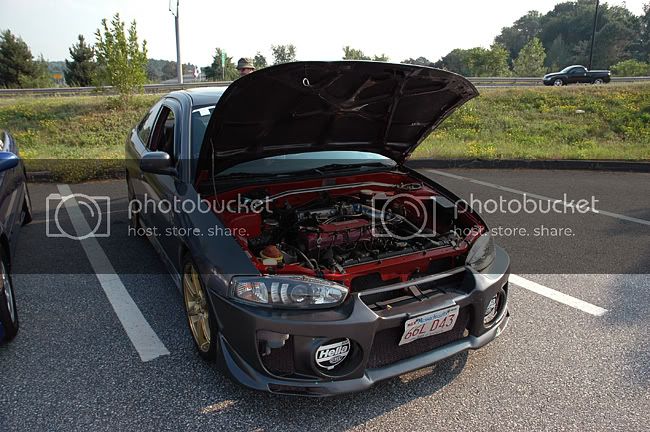
mmm new mirage sextoys.

We may earn a small commission from affiliate links and paid advertisements. Terms

the starter portion of the alarm stores the RPM value so if the car is started with the remote, and is rev'd over a certain RPM it shuts the car off.
 
okay, buttoned up and put away.

re-taped everything and double checked my soldering. everything was still good. tossing no codes.

l_f7c96c91519f0c0eeed133a970d21ebf.jpg


l_b7b231c1631c40d4a7ded799c39aa76c.jpg


l_cb13f9f374ab9ea29f2a04403c78d92e.jpg


hooray for success! tomorrow ima flash it to 1.49 see if i can get the LC1 back.
 
well the tach and emanage are now working 100%. had issues with the RPM wire. hooked both to the CPS and voila!

fresh wash and wax

l_489874fb787cf2c6903af363e1f92ad8.jpg
 
looks great. last night on pinks there was a mirage with a awd eclipse swap. made me think of your car.
 
yeah i have that episode saved :)

soon! maybe sooner than you think.
 
first ever set of 1.5 intake and exhaust manifold flanges. now i can make an equal length turbo manifold and a SMIM.

fap fap fap fap

l_7263c3f4ba1cfd2714f7779aece7a567.jpg


l_25e2d26f9deeb67c30f7069f332b6aaf.jpg


l_5deb4dfef659c22cd15af536bcebbf5e.jpg


m_f7fb2596f68856cd21bd88d8e94ad363.jpg
 
started on my new swaybar bracketry.


going to make brackets off the frame rail using 2x2 square tube. probably overkill since im welding to the frame :) but oh well. after working out some measurements with a ruler, i've found im going to make the brackets 9.5 inches long and add on an extra inch outward toward the bar to fill the gap. i have some things i have to move a bit first though, and the new headerback (catless) will go on next week so i can finish the drivers side bracket.

the plan:
l_410e5863bcd6e6f9dc02e1fb8617ead2.jpg


l_36148eb5d12ab6dcd388f6a6beb79242.jpg


l_aca75ebf9e787a8aa91fb6523b05f2c4.jpg


l_55620fdf01c1629c96864d6be4cc5f46.jpg


l_b44c3e5c5f8c081bf90c8e2b203d7659.jpg


l_1684f9b39a0955d5af397dc6a1d0857b.jpg


l_01002eff703b322bf02e2e4362749773.jpg


once the brackets are up and welded into place im going to weld the grade 8 nuts to the inside of the square tube. hooray!


started making the little brackets.

l_567b96957e7e53ad50ce9b7da05d3139.jpg


LOVE having a drill press.
l_6c2e631ade875fd0b0da1f5fcaad28ad.jpg


bolted up.
l_9812029639d4f482b83e92036428063f.jpg

l_f47db22750f764bc0bf759a56fd76d09.jpg


tacked things down a bit.
l_0f50127fccc6f0a21c38cc3dfeb4e601.jpg
 
here we go. take off your header and clean it up. drill a hole that is big enough to fit the sensor through the bung and sit flat.

l_f883ed4766cbfe44b34d645d1376f621.jpg


now i used a threaded bolt (or the bung bolt when the sensor isnt in) to keep the bung from warping. secure it all with a c-clamp and then weld away.

l_0465a87547b92922d2fcb788814163e0.jpg


now go one step further and cover it in high-temp paint.

l_e84176b40beb94dda04becc49ef4abf0.jpg
 
finished the other side finally. here are the results!

my welds are pretty nice for no gas.
l_7d3384b3cd453cc6c95f2754cb98ccab.jpg


the brackets are a few inches too long. going to have to cut them down after cutting the metal plate to match the frame. then weld the plate to each bracket and bolt it to the car.
l_05a3ea201869fc61e546ac0ae705d855.jpg


l_192fc22430d641c0dcccee214c8ab765.jpg


l_7409ac727b529acdb469e1daab17ab5a.jpg


l_8326f9d87ca795681b03e798b332adc3.jpg


l_4531f222ec698f3f3e04d9113dd4086a.jpg


yes they are two different colors ;)
l_30bd3e04c2dd679cd95b5096f1150bff.jpg
 
full headerback put on, 2.5in, 28in long resonator with a flowmaster 44 muffler.

l_9009eff42673b07d51736a5d59c7cf45.jpg
 
Back
Top