The mad tyte JDM h22a swap for 92-95 EG Civics (should work for 92-00. Edited to include EK 96-00 wiring):

Seeing lots of h22 swap questions and misc B.S h22a threads, I decided I'd make a thread here for Honda Swap. An almost complete h22 swap guide if you will. I've done the swap and regret not taking pics of pulling and installing the h22 in my 92 hatch.
What you'll need:
H22 Motor and trans
p13 ecu(or chipped ecu like a p28)
Shifter box and cables
Swap mounts
Injector resistor box(or do Bizzar's DSM injector resistor mod from d-series.org)
Accord(94ish) Driver's side mid shaft
90-93 Integra axles + the inner CV snout of a 94+ Prelude or Accord(Explained later)
Spare CV grease and boot clamp
After market radiator(suggested) slim fan(almost required)
Upgraded suspension
The usual fluids like oil, coolant, gear oil etc.
Tool wise:
Basic hand tools
Wire cutters/strippers
Soldering gun w/ solder and heat shrink tubing
Drill w/ hole saw attachment
Sawzall/cut-off wheel
Engine hoist w/ load leveler
I'm sure there's other goods needed I'm forgetting at the moment but they shall be mentioned later on.
First:
Pull your existing motor, shift linkage and center console. I do not need to do a step by step on how to remove your motor. If you do not know how to do this please close your IE box now.
Okay, so now your motor is out. It's time to pull out your Sawzall or other cutting device and drill. On the passenger side mount you'll see the bigger hole that your d15/16 mount bolt went though. Cut the ears off both sides right where the threaded nut is welded to it. For the smaller hole, we're going to use this as a pilot hole for your new mount. Take your drill with a long drill bit the same diameter as your mounting bolt and drill out the pilot hole on both sides.
So you have your fresh H22 sitting there on the ground. Go ahead and put your swap mounts on the motor and the rear mount on the chassis. There's a threaded stud on the trans that might need to be cut down to clear the passenger side chassis mount, now would be the time to do that.
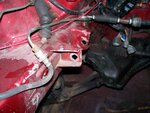
Pull the wiring harness's off both motors. I used a 93 EX harness on my swap. Cut the alternator wiring off the h22 harness and solder it on to the d16 harness and heat shrink the connections. I prefer this method over making your own alternator harness as it's all the correct gauge wire and will not short out. The wire colors should be the same, or close enough to the same, between the h22 and the d16 harness
As for the injector resistor box, it was easier for me to install resistors in to my harness rather than fool with the injector resistor box

WIRING INFORMATION: MERGING OBD1 CIVIC HARNESS TO H22A ENGINE:
To reference to, here is a picture of the factory EG OBD1 (92-95 pinouts). For EK information, I highly encourage to post that!

 hondaswap.com
- Take off and mark every single harness connector on where it came from/where it goes from both H22A and stock civic engine. Make sure you label them of where pulled the plug from! This will save a TON of time!
Mount Civic harness on H22A and measure/modify wire to be lengthened/changed as follows:
- Change fuel injector connectors to H22A type and add resistor pack from H22A harness to Civic harness (see diagram below)
- Extend Alternator wires to reach the H22A alternator (match the pinouts on the plug)
- Lengthen wire that goes to the starter solenoid on starter
- Attach reverse light sensor wire to the new H22A reverse light sensor wire
O2 sensor -add 3 wires to O2 sensor and follow o2 wires and change to Prelude O2 sensor connector. And wire the following:
This only applies to those who have a CX model Civic, or if you use a VX engine harness in a VX! If you have a 92-95 EX/Si/DX, this is NOT required. All OBD2 Civics also do not require this
WHT - WHT/RED wire goes to D14 which is O2 Sensor Input
BLK - ORG/BLK wire goes to A6, which is Heater Control
GRN - GRN/WHT wire goes to D22 which is Sensor Ground
BLK - YEL/BLK wire goes to A25 which is Sensor voltage (you can also splice into the power junction harness at the driver side shock tower harness)
I have taken pictures to clear up more information on the O2 sensor. I will post this tonight.


If you have a VX model Civic, if you USE a different engine harness than the factory VX harness (such as an EX/Si, or DX engine harness), you need to perform the VX O2 sensor fix.
You can do this by simply removing the ORG/BLU wire pin from the 4th VX plug:
and moving it to the missing pin mating up with the WHT wire.
VTEC wiring: This applies to DX,LX,CX models only in 93-95! If you have any 92 model Civic, or any 92-95 EX/Si, you do NOT need to do this
There will be two available slots at the shock tower harness. You just need to simply salvage a male and female pin from an unused plug, and add the pins to the connector for the factory look.
- Add one wire from the VTEC Solenoid (grn/wht wire) to the A4 pinout at the ECU. Add the pin to the shock tower harness, and female pin at the female shock tower connector.
- Add one wire from the VTEC Oil pressure sensor (blk/blu wire) to the D6 pinout, and the other wire which is VTEC oil pressure ground. Simply splice (while soldering!) this to the thermostat ground on the engine harness.
EDIT: EK PINOUTS!
OBD2a (96-98):
VTEC Solenoid -- same thing as stated above only goes to the A8 pinout.
VTEC Pressure switch -- same thing, going to the C15 pinout.
Knock sensor -- same thing, except going to the D6 pinout.
IAB Solenoid - A26 pinout and splice with the Yel/Blk junction harness.
OBD2b (99-00):
VTEC Solenoid -- same thing as stated above only goes to the B12 pinout.
VTEC Pressure switch -- goes to the C10 pinout.
Knock Sensor -- goes to the C3 pinout.
IAB Solenoid -- goes to the B16 pinout.[/quote]


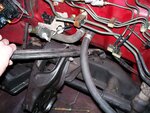
Once you have finished your wiring, you're ready to drop the motor in the car. An engine load-leveler makes it easy to drop the motor in the top since part of the trans will sit under the front subframe rail. If you have access to a lift, you can simply lower the car on to the motor/trans. Once the beast is bolted in, you can hook your wiring harness's up and all that good stuff. You may need a new fuel line to feed the rail. Some say the d16 fuel hose is too short. I use one and it worked just fine for me.
If you have the stock radiator that's about an inch thick it will work fine. You'll just need to install a slim-fan. I'm using an Imperial brand slim fan found at most local auto supply stores and it can be had for ~ $40. If you have one of the after market OEM replacement radiators that has a real thin core YOU WILL need an upgraded radiator. Problem with the thin radiators is they get super heat soaked from the big pig of a motor sitting in the engine bay now. Trust me, I had one for about a day... it will over heat under heavy loads and stop and go traffic. Summit has a radiator for ~ $160. The new Autoworks radiator is running ~ $120 and it's a good piece
Hoses you're looking at a upper hose from a 92 Integra LS(my stock d16 upper hose worked fine) and a 94 Del Sol VTEC(b16) lower radiator hose. You'll also notice one of the heater hoses no longer fits like the old d16 hose. Just use a section of bulk heater hose from your local auto store.
Thicker OEM Radiator

So now the motor is in, time to install your shifter and cables. You'll want to cut out enough metal at the stock shifter hole location to install your new shifter box from the Prelude/Accord. Next, you'll want to put the hole saw on the drill and drill a hole between the center console and the SRS module to run the cables in to the cabin to your shifter. I think others have used a 1”-1.5” hole saw. I cut a hefty section out of the “trans tunnel” and welded in new metal as it was quicker for me. Go ahead and hook the cables to the shifter at this point and then go under the car for the next part. Take the trans side of the shifter cables and slide them in between the firewall and the rack. On P/S cars it can be tricky but is do-able.


Speaking of cables, you'll want a throttle cable. Just take the throttle bracket off your old d15/16 and put it on your h22. Very simple
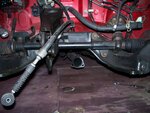
Almost done! Just need some axles. As mentioned, I used a 94 Accord driver's side mid-shift. Driver's side axle from a 90-93 Integra(trim package doesn't matter, make sure if you have ABS you get the axle with the ABS ring on it). You will have to make a custom passenger side axle. Cut the CV band off the Integra passenger side axle and remove the snout that goes in to the trans. Take your Prelude/Accord CV snout and put it on the Integra axle with some extra grease. Carefully slide the CV boot over the Prelude/Accord inner CV snout and put a new band-clamp on it. There's a few other options as far as axles are concerned. If you have the extra cash I'd suggest a HASport axle kit, or something from RA Axles, Gator, or driveshaftshop.com. Go ahead and fill your trans with gear oil and you're good to go.
Integra axle separated and ready for new Prelude CV snout

[A side note on axles: You can run both Integra axles as they come out of the box but the
passenger side axle has a bad tendency to pop out of the trans. This is due to the Prelude/Accord spines on the inner snout are an 1/8th inch longer than the Integra setup.]


When all is said and done, it's suggested to beef up your suspension. I've seen some crazy stuff said like the h22 swap weighs like 300lbs more than the stock d15/16 motor. This is untrue! A guy over on Honda-Tech weighed out all 3 motor setups and ,IIRC, there was around a 80lb difference between the b-swap and h22. None the less, it is more weight in the front of the car. I drove my swap around for a while on stock suspension and it wasn't bad. I switched over to a coil-over setup and it now handles like a dream.
I run a chipped p28 in my car w/ the swap. I did have a p13 for a while and it ran fine. Only reason I switched to the chipped Ecu was the fact I was too lazy to wire in the EGR valve and the knock sensor(Both of which can be disabled in crome or other tuning software and have no adverse effect on performance).
As for your exhaust. It will have to be custom. I haven't found a h22 swap exhaust kit. What I did with mine was cut the header pipe and weld in a new flange to bolt to my existing cat-back exhaust. Any decent exhaust shop should be able to weld in a high-flow cat and hook you up with an exhaust.
My setup almost hooked up

Runnin' and ready to rock

Any errors found, please let me know so I can change them!
Seeing lots of h22 swap questions and misc B.S h22a threads, I decided I'd make a thread here for Honda Swap. An almost complete h22 swap guide if you will. I've done the swap and regret not taking pics of pulling and installing the h22 in my 92 hatch.
What you'll need:
H22 Motor and trans
p13 ecu(or chipped ecu like a p28)
Shifter box and cables
Swap mounts
Injector resistor box(or do Bizzar's DSM injector resistor mod from d-series.org)
Accord(94ish) Driver's side mid shaft
90-93 Integra axles + the inner CV snout of a 94+ Prelude or Accord(Explained later)
Spare CV grease and boot clamp
After market radiator(suggested) slim fan(almost required)
Upgraded suspension
The usual fluids like oil, coolant, gear oil etc.
Tool wise:
Basic hand tools
Wire cutters/strippers
Soldering gun w/ solder and heat shrink tubing
Drill w/ hole saw attachment
Sawzall/cut-off wheel
Engine hoist w/ load leveler
I'm sure there's other goods needed I'm forgetting at the moment but they shall be mentioned later on.
First:
Pull your existing motor, shift linkage and center console. I do not need to do a step by step on how to remove your motor. If you do not know how to do this please close your IE box now.
Okay, so now your motor is out. It's time to pull out your Sawzall or other cutting device and drill. On the passenger side mount you'll see the bigger hole that your d15/16 mount bolt went though. Cut the ears off both sides right where the threaded nut is welded to it. For the smaller hole, we're going to use this as a pilot hole for your new mount. Take your drill with a long drill bit the same diameter as your mounting bolt and drill out the pilot hole on both sides.
So you have your fresh H22 sitting there on the ground. Go ahead and put your swap mounts on the motor and the rear mount on the chassis. There's a threaded stud on the trans that might need to be cut down to clear the passenger side chassis mount, now would be the time to do that.
Pull the wiring harness's off both motors. I used a 93 EX harness on my swap. Cut the alternator wiring off the h22 harness and solder it on to the d16 harness and heat shrink the connections. I prefer this method over making your own alternator harness as it's all the correct gauge wire and will not short out. The wire colors should be the same, or close enough to the same, between the h22 and the d16 harness
As for the injector resistor box, it was easier for me to install resistors in to my harness rather than fool with the injector resistor box
WIRING INFORMATION: MERGING OBD1 CIVIC HARNESS TO H22A ENGINE:
To reference to, here is a picture of the factory EG OBD1 (92-95 pinouts). For EK information, I highly encourage to post that!
ECU Pinouts
Honda ECU Pinouts OBD 0 Pinout '88 HF/Si '90-1 DX (Std.) '90-1 HF/Si '89-92 EF8/9 SiR A1 No.1 INJ Aux INJ w/A3 No.1 INJ No.1 INJ A2 GRD w/A4 to Main Relay GRD w/A4 to Main Relay GRD w/A4 to Main Relay GRD w/A4 to Main Relay A3 No.2 INJ Aux INJ w/A1 No.2 INJ No.2 INJ A4 GRD w/A2 to...
- Take off and mark every single harness connector on where it came from/where it goes from both H22A and stock civic engine. Make sure you label them of where pulled the plug from! This will save a TON of time!
Mount Civic harness on H22A and measure/modify wire to be lengthened/changed as follows:
- Change fuel injector connectors to H22A type and add resistor pack from H22A harness to Civic harness (see diagram below)
- Extend Alternator wires to reach the H22A alternator (match the pinouts on the plug)
- Lengthen wire that goes to the starter solenoid on starter
- Attach reverse light sensor wire to the new H22A reverse light sensor wire
O2 sensor -add 3 wires to O2 sensor and follow o2 wires and change to Prelude O2 sensor connector. And wire the following:
This only applies to those who have a CX model Civic, or if you use a VX engine harness in a VX! If you have a 92-95 EX/Si/DX, this is NOT required. All OBD2 Civics also do not require this
WHT - WHT/RED wire goes to D14 which is O2 Sensor Input
BLK - ORG/BLK wire goes to A6, which is Heater Control
GRN - GRN/WHT wire goes to D22 which is Sensor Ground
BLK - YEL/BLK wire goes to A25 which is Sensor voltage (you can also splice into the power junction harness at the driver side shock tower harness)
I have taken pictures to clear up more information on the O2 sensor. I will post this tonight.
If you have a VX model Civic, if you USE a different engine harness than the factory VX harness (such as an EX/Si, or DX engine harness), you need to perform the VX O2 sensor fix.
You can do this by simply removing the ORG/BLU wire pin from the 4th VX plug:
and moving it to the missing pin mating up with the WHT wire.
VTEC wiring: This applies to DX,LX,CX models only in 93-95! If you have any 92 model Civic, or any 92-95 EX/Si, you do NOT need to do this
There will be two available slots at the shock tower harness. You just need to simply salvage a male and female pin from an unused plug, and add the pins to the connector for the factory look.
- Add one wire from the VTEC Solenoid (grn/wht wire) to the A4 pinout at the ECU. Add the pin to the shock tower harness, and female pin at the female shock tower connector.
- Add one wire from the VTEC Oil pressure sensor (blk/blu wire) to the D6 pinout, and the other wire which is VTEC oil pressure ground. Simply splice (while soldering!) this to the thermostat ground on the engine harness.
EDIT: EK PINOUTS!
OBD2a (96-98):
VTEC Solenoid -- same thing as stated above only goes to the A8 pinout.
VTEC Pressure switch -- same thing, going to the C15 pinout.
Knock sensor -- same thing, except going to the D6 pinout.
IAB Solenoid - A26 pinout and splice with the Yel/Blk junction harness.
OBD2b (99-00):
VTEC Solenoid -- same thing as stated above only goes to the B12 pinout.
VTEC Pressure switch -- goes to the C10 pinout.
Knock Sensor -- goes to the C3 pinout.
IAB Solenoid -- goes to the B16 pinout.[/quote]
Once you have finished your wiring, you're ready to drop the motor in the car. An engine load-leveler makes it easy to drop the motor in the top since part of the trans will sit under the front subframe rail. If you have access to a lift, you can simply lower the car on to the motor/trans. Once the beast is bolted in, you can hook your wiring harness's up and all that good stuff. You may need a new fuel line to feed the rail. Some say the d16 fuel hose is too short. I use one and it worked just fine for me.
If you have the stock radiator that's about an inch thick it will work fine. You'll just need to install a slim-fan. I'm using an Imperial brand slim fan found at most local auto supply stores and it can be had for ~ $40. If you have one of the after market OEM replacement radiators that has a real thin core YOU WILL need an upgraded radiator. Problem with the thin radiators is they get super heat soaked from the big pig of a motor sitting in the engine bay now. Trust me, I had one for about a day... it will over heat under heavy loads and stop and go traffic. Summit has a radiator for ~ $160. The new Autoworks radiator is running ~ $120 and it's a good piece
Hoses you're looking at a upper hose from a 92 Integra LS(my stock d16 upper hose worked fine) and a 94 Del Sol VTEC(b16) lower radiator hose. You'll also notice one of the heater hoses no longer fits like the old d16 hose. Just use a section of bulk heater hose from your local auto store.
Thicker OEM Radiator
So now the motor is in, time to install your shifter and cables. You'll want to cut out enough metal at the stock shifter hole location to install your new shifter box from the Prelude/Accord. Next, you'll want to put the hole saw on the drill and drill a hole between the center console and the SRS module to run the cables in to the cabin to your shifter. I think others have used a 1”-1.5” hole saw. I cut a hefty section out of the “trans tunnel” and welded in new metal as it was quicker for me. Go ahead and hook the cables to the shifter at this point and then go under the car for the next part. Take the trans side of the shifter cables and slide them in between the firewall and the rack. On P/S cars it can be tricky but is do-able.
Speaking of cables, you'll want a throttle cable. Just take the throttle bracket off your old d15/16 and put it on your h22. Very simple
Almost done! Just need some axles. As mentioned, I used a 94 Accord driver's side mid-shift. Driver's side axle from a 90-93 Integra(trim package doesn't matter, make sure if you have ABS you get the axle with the ABS ring on it). You will have to make a custom passenger side axle. Cut the CV band off the Integra passenger side axle and remove the snout that goes in to the trans. Take your Prelude/Accord CV snout and put it on the Integra axle with some extra grease. Carefully slide the CV boot over the Prelude/Accord inner CV snout and put a new band-clamp on it. There's a few other options as far as axles are concerned. If you have the extra cash I'd suggest a HASport axle kit, or something from RA Axles, Gator, or driveshaftshop.com. Go ahead and fill your trans with gear oil and you're good to go.
Integra axle separated and ready for new Prelude CV snout
[A side note on axles: You can run both Integra axles as they come out of the box but the
passenger side axle has a bad tendency to pop out of the trans. This is due to the Prelude/Accord spines on the inner snout are an 1/8th inch longer than the Integra setup.]
When all is said and done, it's suggested to beef up your suspension. I've seen some crazy stuff said like the h22 swap weighs like 300lbs more than the stock d15/16 motor. This is untrue! A guy over on Honda-Tech weighed out all 3 motor setups and ,IIRC, there was around a 80lb difference between the b-swap and h22. None the less, it is more weight in the front of the car. I drove my swap around for a while on stock suspension and it wasn't bad. I switched over to a coil-over setup and it now handles like a dream.
I run a chipped p28 in my car w/ the swap. I did have a p13 for a while and it ran fine. Only reason I switched to the chipped Ecu was the fact I was too lazy to wire in the EGR valve and the knock sensor(Both of which can be disabled in crome or other tuning software and have no adverse effect on performance).
As for your exhaust. It will have to be custom. I haven't found a h22 swap exhaust kit. What I did with mine was cut the header pipe and weld in a new flange to bolt to my existing cat-back exhaust. Any decent exhaust shop should be able to weld in a high-flow cat and hook you up with an exhaust.
My setup almost hooked up
Runnin' and ready to rock
Any errors found, please let me know so I can change them!
Attachments
Last edited:
") To me, the radioshack resistor job looks cleaner than adding wires for a resistor box, but that's one of those "to each their own" discussions
To me, the radioshack resistor job looks cleaner than adding wires for a resistor box, but that's one of those "to each their own" discussions 