Bad little allmotor Ls/Vtec build!!

We may earn a small commission from affiliate links and paid advertisements. Terms

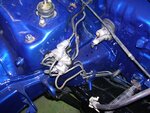
The b16 manifold flows quite well and will work fine for this setup. Plus it is coming back off so I can port match it to the new edelbrock throttle body and all of the casting will be cleaned up out of it. We didnt want to go too radical on compression because a fairly healthy shot of nitrous will more then likely be in the future.
 
Last edited:
Here is a little update. The car is almost a rolling chasis again but not quite. I still have the driver side front suspension and front brakes on both sides to complete. Then I will be finishing up the wiring and getting that new motor in! Here is the original 1988 pussy drums, springs, and struts. They were all untouched from the day they were put together. Then I yanked everything out because I had something better....
 

Attachments

  • 100_0070.JPG
    100_0070.JPG
    799.7 KB · Views: 365
  • 100_0071.JPG
    100_0071.JPG
    824.9 KB · Views: 344
I decided for this car to go with the tanabe grip force springs with tokico blues. Since the car was going to have alot more power I opted for the integra rear disc conversion as well.
 

Attachments

  • 100_0069.JPG
    100_0069.JPG
    469.7 KB · Views: 316
  • 100_0072.JPG
    100_0072.JPG
    661.5 KB · Views: 341
Here is a shot after a little was put together.
 

Attachments

  • 100_0075.JPG
    100_0075.JPG
    585.6 KB · Views: 358
  • 100_0074.JPG
    100_0074.JPG
    509.4 KB · Views: 408
Here is the final product. I took the calipers and brackets and blasted them to bare steel removing all the rust and old paint. Then I painted them using Transtar's 2k epoxy primer/sealer followed by a wet coat of gloss black Dupont Imron. Then I installed the rear links to correct the camber, power slot rotors, oem factory pads, and the stainless steel brake lines.
 

Attachments

  • 100_0103.JPG
    100_0103.JPG
    812.9 KB · Views: 369
  • 100_0104.JPG
    100_0104.JPG
    655.9 KB · Views: 369
Last edited:
This is a shot of the crossmember after it had been sanded sealed and painted with basf black urethane. It looks damn good in there. Getting out the old mount that was on there was a pain in the ass.
 

Attachments

  • 100_0102.JPG
    100_0102.JPG
    952.3 KB · Views: 418
Here is some more stuff I painted. I got remanufactured calipers I painted them with the transtar and imron also along with the brackets. I took the knuckle blasted it and painted it with the gloss black. I also had new wheel bearings pressed in at the machine shop. Take a look at the before and after pictures of the LCAs. I painted one of them and replaced the other side with a brand new one from Honda. The new one from honda doesnt look as good as mine! Ohh I also blasted and painted the lower forks that hook onto the struts. Thats a shot of the passenger side strut and spring fully assembled. Also a shot of the new upper control arms with slideable ball joint to correct camber.
 

Attachments

  • 100_0107.JPG
    100_0107.JPG
    711.4 KB · Views: 380
  • 100_0106.JPG
    100_0106.JPG
    549.1 KB · Views: 341
  • 100_0112.JPG
    100_0112.JPG
    635.8 KB · Views: 360
  • 100_0110.JPG
    100_0110.JPG
    810.3 KB · Views: 358
  • 100_0108.JPG
    100_0108.JPG
    823.8 KB · Views: 577
Well here is where the project sits now. I got the passenger side supension in. I also replaced the tie rod and lower ball joint boots and clips. Those are always a joy to put on, lol! The front brakes also have factory pads and power slot rotors with the stainless lines and remaned calipers. That shits going to look awesome in there! Its kind of fucked up that this 1988 crx looks better in the wheel wells then my 2000 si.
 

Attachments

  • 100_0111.JPG
    100_0111.JPG
    615 KB · Views: 422
Once I get the suspension back in and brakes things will really start to move fast. It has been time consuming to make everything look as good as it does. But I told my friend if your going to spend all this money its worth the extra time to make it look as good as it will perform. The engine is done and I have 99% of the parts needed to finish it. Another reason this build has taken so long is the cost of parts. My friend has been broke after buying all of this shit every paycheck for the last 2 and half years. But like I said I will finish this thread untill the car is done along with a dyno sheet after I tune it. If you like my thread/build please feel free to make comments or suggestions. You can even add to my reputation if you like since it does take me a while to upload all of these pictures with captions.
 
I appreciate you sharing the pics, you're doing an awesome job.
Repz 4 yoo

Thanks I am glad that someone likes the build. Your build is pretty sweet also. Props on all the fab work you have done on that!
 
Here are some final shots of the passenger side suspension and brakes. The funny looking stuff on the new rotors is actually mold! There were in the brand new sealed bags I am not sure if it was the humidity in the shop or what that caused it, kind of weird.
 

Attachments

  • 100_0114.JPG
    100_0114.JPG
    663.3 KB · Views: 382
  • 100_0113.JPG
    100_0113.JPG
    792.4 KB · Views: 414
Last edited:
Here is the driver's side all finished up. You can see a couple of rust holes that we are going to cut out and repair here shortly. We will weld in a couple patch pieces and re undercoat it. Check out the difference in the new vs. old swaybar link bushings!
 

Attachments

  • 100_0118.JPG
    100_0118.JPG
    724 KB · Views: 336
  • 100_0119.JPG
    100_0119.JPG
    600 KB · Views: 287
  • 100_0115.JPG
    100_0115.JPG
    453.3 KB · Views: 339
Here is a shot of the integra proportioning valve to make the rear disc conversion complete.
 

Attachments

  • 100_0120.JPG
    100_0120.JPG
    872 KB · Views: 942
Well the car would be a complete rolling chasis again except for one problem... After looking at the driverside rear suspension closer I noticed a huge problem. I placed a wheel up on it and it is turned in towards the car when it should be straight! The trailing arm of this side of the suspension had to of suffered some damage in a accident. So the salvage yard that sold this to me is going to hear from me soon. Luckily the other side is fine and is straight as can be. So now I am going to have to find a drivers side trailing arm to fix this. It makes the saying one step forward two steps back seem very true! This is exactly why I take my time to grease ALL of my hardware when I put stuff together! I am not going to let this halt the forward momentum of the project though. I will be getting the tranny with the new clutch and flywheel bolted up and start tackling the wiring. I will keep updating as progress is made.
 
Back
Top